Essential Healthy Living

Monday, October 31, 2016

Homemade Instant Pot Pumpkin Puree

Homemade Instant Pot Pumpkin Puree

Why use canned pumpkin puree when you can make your own? It really is very simple and easy. If you are anything like us, my house is overrun with pumpkins. It seems every event we attend, we come home with a free pumpkin. I really hate for those pumpkins to go to waste. First I remove the pumpkin seeds and roast them, then I make my pumpkin puree.

Ingredients:


Instructions

Homemade Instant Pot Pumpkin Puree

First I remove the pumpkin seeds and roast them for eating.

Homemade Instant Pot Pumpkin Puree

Next I scrape out the insides from the pumpkin "meat" and cut the pumpkin into pieces. I've learned after several times that you really don't need to cut the pieces as small as shown.

Homemade Instant Pot Pumpkin Puree

Place 1 cup of water and a trivet into the Instant Pot. Add the pumpkin pieces into the Instant Pot.

Put the lid on and make sure the valve is on sealing (not venting). Hit the 'manual' button and then make sure it is on high pressure, 10 minutes cook time.

When the 10 minutes of cook time is over, do a quick pressure release. Be careful of any splatter coming from the vent. I like to put a towel over the vent just in case that happens. I also use an oven mitt on my hand. Once the pressure has released, open the lid. Turn off the Instant Pot and remove the pumpkin piece. Let cool.

Remove the skin from the pumpkin, which should come off very easily. Place the pumpkin pieces into a food processor and process until pureed. Then use your puree in all your favorite recipes - chocolate chip pumpkin muffins are my favorite!


Bridget Davet

Using the affiliate links in this blog to make purchases helps support my site. Thank you in advance!

Thursday, October 27, 2016

Homemade Scented Halloween Playdough

Soft Homemade Playdough scented with essential oils

Move over pricey stinky playdough! I know that the store bought store says "non-toxic", but I don't know what the heck is in there. And the smell turns my stomach. DIY playdough is not only super soft and cheap to make, but is non-toxic and safe (in case you have that kid, like me, who eats everything). You can even customize the scent to your liking. Best of all, you probably already have all the ingredients right there in your own home.

You will need:

Soft Homemade Playdough Scented with Essential Oils

  • 1 cup of flour {Amazon link}
  • 1/3 cup of salt {Amazon link}
  • 1 tsp. cream of tartar {Amazon link}
  • 1 Tbsp coconut oil {Amazon link}
  • 4-8 drops Young Living essential oil of choice
  • 1 cup water
  • Pint size wide mouth jar {Amazon link}
  • Felt, ribbon or material for stem (optional)
  • Sharpie marker or cut vinyl for jack-o-lantern
  • Halloween cookie cutter (optional){Amazon link}

Instructions

Combine all ingredients in a sauce pan and stir. Heat over med-high heat until the playdough thickens up a bit. This should just take a few minutes. Take off of stove and let cool. Knead in your essential oil.

This recipe will make enough to fill a 16oz jar. To decorate your jar, use a sharpie marker, some cut vinyl, etc. You could use some felt for a stem if you'd like. Super fun and easy to make. Great for all the kiddos on your list. You can also add a cute cookie cutter for them to play with the dough.


Bridget Davet

Using the affiliate links in this blog to make purchases helps support my site. Thank you in advance!

Monday, October 17, 2016

Homemade Toxic Free Candles

Homemade Toxic Free Candles

I love candles. They are calming and romantic, but not when they are emitting harmful chemicals into my air. No thanks! But thanks to some toxic free ingredients, you can make your own toxic free candles at home.

A fun option would be to use the 16oz colored mason jars for candles: purple {Amazon link}, blue {Amazon link} or green {Amazon link}. Just make sure you purchase longer wicks if using a larger or taller jar. The newly released blue wide mouth 8oz elite jars {Amazon link} would be neat. I made some 4oz and 8oz candles as shown.

You will need:


Instructions

I purchased candle wicks that fit the 8oz jelly jar. If you are using a taller jar, you will need longer wicks. The soy wax will melt down to half of what you measure in a measuring cup. If you measure 2 cups of wax flakes, it will melt down to 1 cup. You can use beeswax instead of soy wax, but it is more than double the price.

Fill the measuring cup with soy wax flakes. When filling my 4oz small jar, I measured 8oz of soy wax flakes. Melt wax in the microwave for 30 seconds. Stir with a wooden stick. The wooden stick makes it easy for clean up since these are perfect for stirring and cheap to throw away. Microwave for 20-30 seconds at a time, stirring after each time until all the wax is completely melted. Stir in 8-15 drops of essential oils per 4oz candle. You can change this amount more or less to your preference.

You can anchor the wick to the bottom of the jar with some hot glue if you’d like, which makes things a little easier. If not, you can use a little of the melted wax, though the wick will move when more hot wax is poured in the jar. Wrap the top of the wick around a pencil or wooden stick and set the pencil across the top of the candle to hold the wick in place. Pour the melted wax into the jar, being careful not to overfill the jars. Position the wick in the center of the candle if it has shifted. You might have to move it again while it dries if it moves from center. Let sit out for a few hours to harden, then trim the wicks to an inch from the candle.

Want more amazing recipes in a 160 page pdf? Check out my new eBook here.


Bridget Davet

Using the affiliate links in this blog to make purchases helps support my site. Thank you in advance!

Wednesday, October 12, 2016

Homemade Vanilla Extract

DIY Homemade Vanilla Extract

For years I’ve entertained the idea of making homemade vanilla extract. I’ve watched friends make it as Christmas gifts for years, but now it is my turn. I finally decided to take the leap to make my own batch. I cannot believe how easy it is to make or why I waited this long to try. This picture shows what it looks like when first bottled. One was made using burbon and one with vodka.

You will need:


Instructions

You will need 3-4 vanilla beans for each 8oz jar. If you purchase vanilla beans in bulk {Amazon link}, you will pay about $1 or less per vanilla bean. In the grocery store, they sell them for more like $5 each bean. Cut each vanilla bean in half and place the half pieces into the jars. Each jar will contain 6-8 vanilla half pieces. I put 6 vanilla bean half pieces in each of my jars for this batch. Fill each jar with vodka. Cover the jars tightly and store in a dark, cool place. Give them a good shake about once a week.

The longer the vanilla extract ages, the more intense the flavor will be. I used Madagascar vanilla beans for this batch, however there are many different types of vanilla beans. I decided to start with the most popular, but you can also purchase a vanilla beans assortment pack {Amazon link}.

In about 2 months, your homemade vanilla extract will be ready. When your batch is ready discard the vanilla beans and your extract is ready. Homemade vanilla extract is great to package into cute bottles and give as gifts. I purchased cute 8.5oz clear glass bottles {Amazon link} and will make personalized labels to go on each bottle for Christmas gifts this year. You could also make some smaller ones using these 5oz jars found on Amazon {Amazon link}. To create unique extracts, use bourbon, brandy or rum instead of vodka for your homemade vanilla extract.

Want more amazing recipes in a 160 page pdf? Check out my new eBook here.


Bridget Davet

Using the affiliate links in this blog to make purchases helps support my site. Thank you in advance!

Friday, July 15, 2016

How to Make Calendula Flower Infused Oil

DIY Calendula Flower Infused Oil - Young Living

Calendula flowers contain many beneficial healing properties used for centuries for wounds and skin irritations. Some of those properties include promoting the regeneration of new tissues and providing soothing relief for damaged or injured skin. It is also used for reducing inflammation and to control bleeding. Making an infused oil with calendula flowers is great for utilizing these properties. You can then use your calendula infused oil straight, or use it to make your lotions, balms, creams, salves, etc.

You will need:


Instructions

There are two methods of infusing the oil. The sun method (think sun brewed tea) or the heat method if you need your infused oil right away.

Sun method: Fill your jar of choice with calendula flowers. I like to make very small batches of infused oil at a time. Add in carrier oil of choice until it covers the flowers. Place the jar on a warm, sunny windowsill and shake once per day. Let it steep for 4-6 weeks for the oil to infuse with the calendula flowers.

Heat method: Fill a larger jar than what you will need half full with calendula flowers. Then fill the jar with carrier oil of choice until the flowers are covered. Place the jar in a saucepan of water on the stove. Turn on the stove to a low to med-low. Leave for 3-8 hours to infuse. Make sure the water does not evaporate. Refill the water as needed. You can also use a slow cooker instead of a saucepan.

Once you have your calendula infused oil ready, you will need to strain it. Using a cheesecloth, strain the calendula infused oil into a clean jar. Store for up to one year in a cool dark place. I like to use 5oz woozy bottles {Amazon link} or reuse empty 6oz wine bottles to store my infused oil. Add a cute label and give as a gift to a friend. Make sure you include the type of carrier oil used and date of infusion.

Want more amazing recipes in a 160 page pdf? Check out my new eBook here.


Bridget Davet

Using the affiliate links in this blog to make purchases helps support my site. Thank you in advance!

Wednesday, May 18, 2016

Good snacks for kids or glorified junkfood?

Momma is on fire today! Yesterday my son went to the pediatrician for his 4 year checkup. Like all checkups, we were sent home with a packet of handouts. Last night I was casually browsing through the handouts and was shocked at what I found. Before I tell you what got me fired up, I have a question for you to consider. Let's say I was your nutritional counselor, personal trainer, lifestyle coach, teacher or maybe even your doctor. Say I gave you the following list as 9 examples of GOOD snack choices. Read the list carefully and let me know if you'd want to keep paying me or if the words "you're fired!" come to mind:

Good snack examples:

  • Apple + peanut butter or cheese
  • Snickers bar
  • Cookies and whole milk
  • Celery + peanut butter with raisins
  • Yogurt and granola
  • Peanut butter and jelly sandwich
  • EZ Mac with bacon bits
  • Peanut butter crackers
  • Trail mix

Hopefully you'd fire me and I would deserve it. Now add the words "for children with teeth" after "Good snack examples" {See photo at end of post}. That is what the "nutrition guidelines" sheet showed in my take home packet.

Maybe you are confused as to why a Snickers bar is not a good choice. Let's take a closer look. Per Snickers "nutritional" info page, here is the list of ingredients: MILK CHOCOLATE (SUGAR, COCOA BUTTER, CHOCOLATE, SKIM MILK, LACTOSE, MILKFAT, SOY LECITHIN, ARTIFICIAL FLAVOR), PEANUTS, CORN SYRUP, SUGAR, PALM OIL, SKIM MILK, LACTOSE, PARTIALLY HYDROGENATED SOYBEAN OIL, SALT, EGG WHITES, ARTIFICIAL FLAVOR.

What I see here is sugar, lots of artificial flavors (toxins), soy lechithin (no bueno), corn syrup (gmo, not a high quality sugar to say the least), Partial hydrogenation (an industrial process used to make a perfectly good oil, such as soybean oil, into a perfectly bad oil. The process is used to make an oil more solid; provide longer shelf-life in baked products; provide longer fry-life for cooking oils, and provide a certain kind of texture or "mouthfeel." The big problem is that partially hydrogenated oil is laden with lethal trans fat.), more sugar, etc. The peanuts are good - hey, I'm giving credit where credit is due. I'm sure the eggs don't come from free range chickens, but I'm trying to bring my crunchiness down a notch for general sake.

Let's check out those "nutritional" facts. The snickers bar contains 4.5g of Saturated and 27 grams of sugar. Besides a little sodium (levels not a problem in this bar) and some other fats, this bar contain no other nutritional components. According to The American Heart Association (AHA), a 4 year old male should consume about 1200-1400 calories per day. This one snack is 1/5 of his total daily calories, which probably isn't a problem, but what are those calories made up of is the big question. Not all calories are created equal.

Saturated fat: According to U.S. Department of Health and Human Services, no more than 10 percent of your child's daily calories should come from saturated fat, regardless of age or gender. In a 1,300-calorie diet, that's 14 or fewer grams of saturated fat. That means this one "snack" is 1/3 of his saturated fat total income limit.

Sugar: Per the AHA, children ages 4-8 with a daily caloric intake of 1,600 calories should consume no more than about 3 teaspoons a day. One teaspoon of granulated sugar equals 4 grams of sugar. Therefore 12 grams of sugar in a product is equal to 3 teaspoons of granulated sugar. This ONE snack has 27 grams of sugar, which equals 6.75 teaspoons of sugar. I don't think I need to explain this point any further. According to the American Heart Association, the average 1 to 3 year old consumes about 12 teaspoons of sugar each day, and the average 4 to 8 year old takes in 21 teaspoons.

Only 2 items on this list I would call a GOOD snack choice. 2 items I found questionable depending on the source of the ingredients. I've seen some pretty healthy trail mix and I've seen some mixed junk, masquerading as trail mix. Again the yogurt and granola depends on how much sugar (or worse artificial sugar) and junk it contains. 5 of the 9 were totally unacceptable as good snack choices in my opinion. I won't dissect the other unhealthy snack choices, but I HAVE to comment on the EZ Mac with bacon bits. Are you kidding me? I can't even comment on this one. If we honestly believe as a society that EZ mac with bacon bits (btw, I'm sure they are ok with the imitation bacon bits since not clarified), is a good source of food or nutrition, then we have a long way to go in our thinking. We really need to education and empower ourselves as a society to learn the difference between real "food" and "food like" substances. Our kids deserve better than this. We are failing our kids and failing ourselves if we think this is 9 examples of GOOD snack choices. With 1 out of 3 American kids now considered overweight or obese, our thinking has to change. With the number of issues our kids face today, ranging from spectrum disorders to diabetes, we owe it to them to evaluate our toxic society and get back to the core of the problem. Toxins (from our enviroment or from food) is a major issue that MUST be addressed. We can no longer sit back in denial and say 'I have no clue why our kids are fat or face the health issues they face today." WAKE UP America! Wake up!

To add two quick notes, I have contacted the doctor to discuss the list. Hopefully I can get the practice to reconsider this handout or make revisions. On the second note, there are ways to make some of the ones on the list good options. Had 'peanut butter and jelly' said 'All natural sugar and salt free peanut butter and homemade no sugar organic fruit preserves on a brown rice cake or sprouted Ezekiel bread', I'd have agreed this was a good option, but I somehow doubt that is what they meant.

Live well, my friends!


Bridget Davet

Wednesday, April 20, 2016

DIY Carrier Oil Stick

DIY Carrier Oil Stick for applying essential oils - Young Living

No need to carry liquid carrier oils to apply your essential oils when you can carry a carrier oil stick! This is one of my favorite essential oil accessories I like to keep handy. This was my lifesaver when traveling to Ecuador in March. Instead of carrying a bottle of liquid carrier oil, I took this along instead. Makes applying your essential oils a breeze! Like all other balms, this one is super easy to make and can also be used as a skin moisturizing balm as well.

You will need:


Instructions

Place a 1 cup glass measuring cup (or double boiler) into a saucepan filled with water. Put the beeswax into the measuring cup and heat the beeswax on low-medium to medium heat until the beeswax is melted. Add almond oil and jojoba oil to the measuring cup and continue to heat until all the items are melted. Add shea butter and heat until melted. Stir constantly as they melt.

Once everything is melted, remove from the heat. Pour your balm into the twist-up tube and small .5oz tin and allow to cool. This recipe will make 3 ounces of carrier oil balm. I like to use a 2.5oz twist-up tube and a small tin (to keep in my purse when I’m on the go, instead of bringing the larger tube), but you can also use small or large lip balm tubes for the extra .5 ounce or adjust the recipe. The 2.5oz tube holds slightly over 2.5 ounces.

To use, apply carrier oil stick to skin, add essential oils and rub in.

Fun idea ~ Once you fill the 2.5oz twist-up tube, add a few drops of your favorite essential oil to the remaining balm, stir and then fill a .5oz tin or several lip balm tubes for super awesome lip balm.

Want more amazing recipes in a 160 page pdf? Check out my new eBook here.


Bridget Davet

Using the affiliate links in this blog to make purchases helps support my site. Thank you in advance!

Thursday, April 14, 2016

Best healthy lunch choice or not?

Thieves and Honey Lemon Tea Gummies with Thieves and lemon essential oil

Today we ate lunch at Chick-fil-A, our go-to fast food joint. If you know anything about me and my family, we eat at Chick-fil-A quite a bit. The team members at Chick-fil-A have become like our family. I love Chick-fil-A, but let's just review what a healthy lunch would look like at Chick-fil-A. Let's not nick-pick this apart or read too much into it. Try your hardest to live by the 80/20 rule (80% healthy, 20% other), but sometimes, life finds you at a fast food restaurant. Just try to make the best choices where ever you are eating. Today, this photo was on our table, so I thought I'd pick it apart for you and make my observations.

At first glace, this indeed looks like a very healthy lunch. You have grilled chicken, some nice leafy greens and non-calorie drink. AND only 280 calories. This is a diet jackpot! Or is it? Let's break it apart. First let's start with the protein portion of the meal. Protein is essential for your body and a must-have at every meal. At Chick-fil-A you have the choice of two proteins: grilled chicken breast or fried chicken breast. Obviously grilled is a better choice over the fried chicken. But be aware of your ingredients.

Per the Chick-fil-A website, ingredients are: Grilled chicken (whole breast filet, seasoning [water, apple cider vinegar, soybean oil, yeast extract, salt, modified corn starch, palm oil, dehydrated garlic, dehydrated onion, corn maltodextrin, sea salt, flavor, sugar, chicken stock, cane molasses, chicken fat, spice, natural flavor {including smoke}, dextrose, lemon peel, citric acid, red bell pepper, orange juice concentrate, grape juice concentrate, natural flavor, paprika, vinegar, xanthan gum, ascorbic acid, and spices]).

Do you see what I see? Lots of GMO items, soybean oil, corn maltodextrin, just to name a few. You can google any you don't recognize, but just be aware of all the additives and hidden ingredients in your innocent grilled chicken breast/nuggets. The fried version has very similar ingredients including some extras for the breading, including milk products, etc. Another hidden element here is the sodium. 8 grilled nuggets have 530mg of sodium. Per the FDA, the daily value for sodium is less than 2,400 milligrams (mg) per day. 8 fried nuggets contain 1060mg. Grilled chicken breast at home prepared with healthy ingredients would be best, but if you have to eat out, this would be a better choice over the fried.

Now let's examine the new Superfood Side. It is very pretty and taste yummy. Kale + walnuts + "flavorful dried sour cherries" = heaven, so let's move on.... right? Not so fast! Let's take a look at the ingredients on this one:

Broccolini®, kale, maple vinaigrette dressing (maple syrup, soybean oil, water, brown sugar, onion ([including dehydrated], distilled vinegar, apple cider vinegar, soy sauce [water, soybeans, salt, alcohol], balsamic vinegar, salt, spice, xanthan gum, potassium sorbate and sodium benzoate added as preservatives, maltodextrin, dextrose, canola oil, yeast extract, natural flavor, calcium disodium EDTA to protect flavor), dried cherries (cherries, sugar, sunflower oil), roasted nut blend (glazed walnuts [walnuts, sugar, natural flavor, canola oil], roasted almonds, glazed pecans [pecans, sugar, natural flavor, canola oil]).

Again, do you see what I see? Soy sauce (gmo, gluten), soybean oil (no bueno!), Sodium benzoate (a preservative that promotes cancer and kills healthy cells), canola oil (gmo, first used as an insect repellent, one to avoid), just to name a few. Personally I would skip this side at all cost. Instead opt for the side salad, preferably with no cheese and no dressing or bring your own dressing with you. The dressings will have similar ingredients to those listed above. Pair that with a fruit cup or top the side salad with the fruit to add flavor.

Lastly we have the unassuming diet beverage. I will not go into my lengthy lecture on the dangers of diet drinks, I will just say this: STAY AWAY FROM THE DIET DRINK! I don't want to hear your excuses that you can't have sugar, therefore you are opting for the chemical drink. Don't go there and don't lie to yourself. Diet drinks do way more harm than most of the crap you can get into your body. Drink water with your meal instead. See, I just saved you $2! In reality, for optimal digestion, it is wise to NOT drink ANYTHING while you eat. You chew your food until liquid, then swallow. Drink a glass of water after you leave. If you can't bare to drink water, opt for a medium tea. If you HAVE to have some "sugar" in it, then order it 1/4 sweet and 3/4 unsweet. This will bring the calories down from 130 to 32.5 and the total sugars from 32 down to 8 grams. Not the best, but a BETTER choice. Tip for drinking unsweetened tea: Start off by ordering 3/4 sweet-1/4 unsweet. Once you get used to that, move the ratio to 2/3-1/3, then 1/2-1/2, etc. until you get down to the 1/4-3/4 or full unsweet tea. You will adjust to the taste, I promise! After that, if you try and order a full sweet tea, it will be so super sweet, you won't want to drink it.

On a side note: I totally was eating a spicy chicken sandwich, large fries and 1/4 sweet tea while taking this picture. It is not about being perfect 100% of the time. It is about making healthier choices whenever you can and knowing what you are putting into your body.


Bridget Davet

Thursday, January 28, 2016

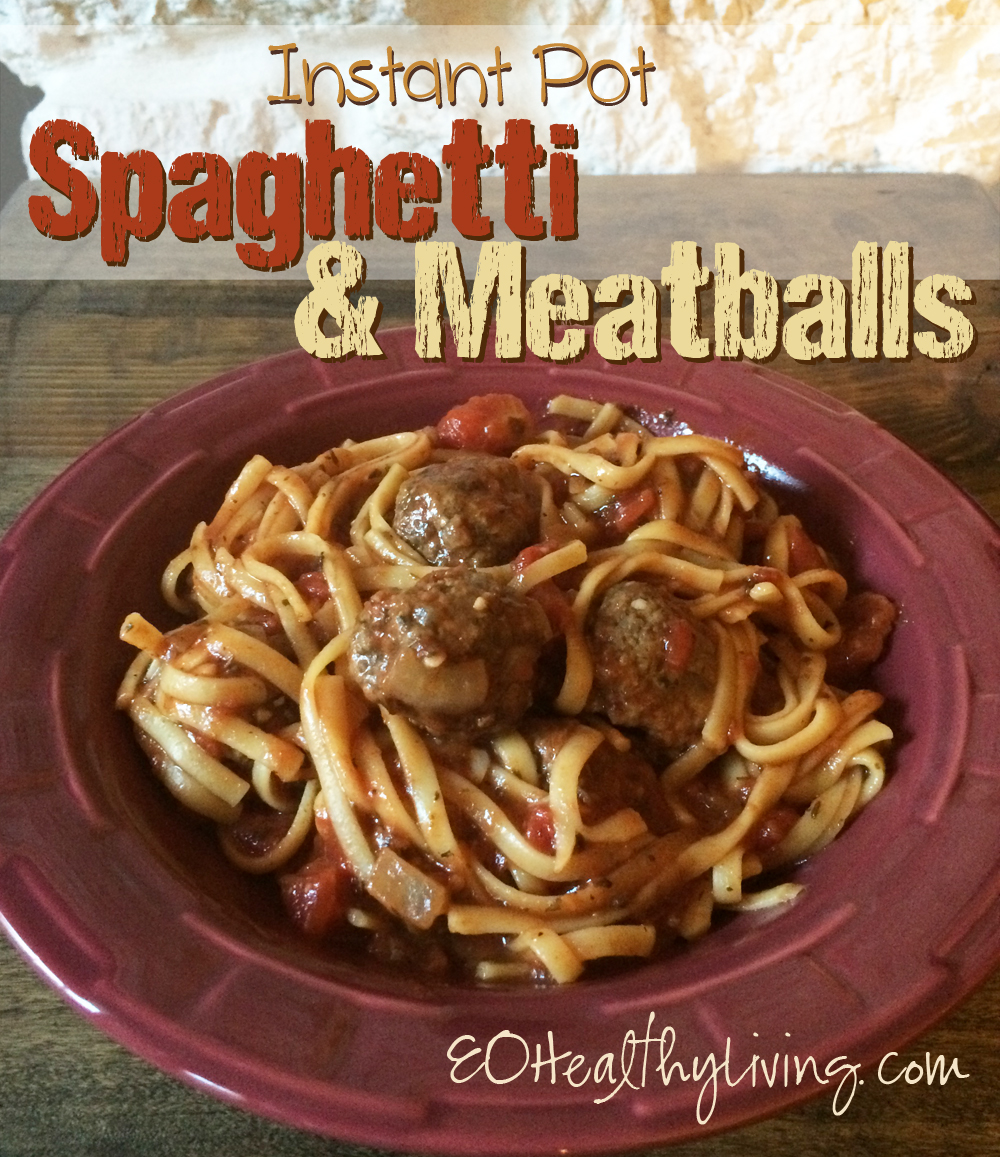
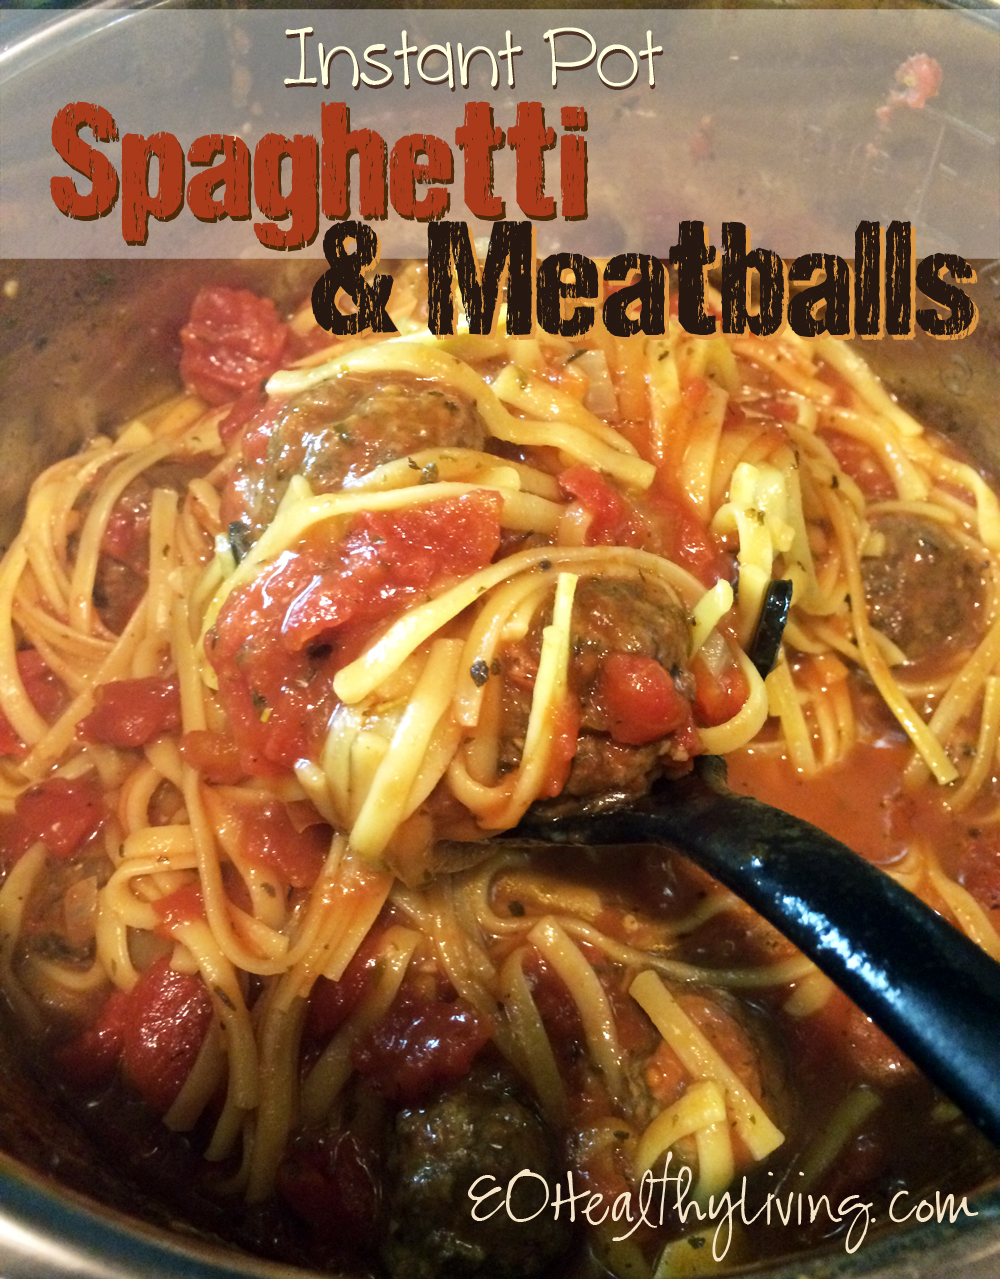
One Pot Pressure Cooker Spaghetti And Meatballs - Instant Pot

One Pot Pressure Cooker Spaghetti Sauce With Pasta and meatballs - Instant Pot

The days of 2+ hours, slaving over a hot stove, cooking homemade spaghetti and meatballs with pasta and countless dirty pots are finally over! In about a half hour from start to finish, you can cook everything, including the pasta, in ONE pot. Amazing!

Ingredients:

  • 1-2 Tbls oil {Amazon link}
  • 1 lb meatballs, fully cooked - I only use my homemade meatballs
  • 1 onion, diced
  • 4 cloves of garlic - minced
  • 4 14.5oz cans diced tomatoes {Amazon link}
  • 1 8oz can tomato sauce {Amazon link}
  • 2 cup chicken broth or water - I use homemade chicken bone broth {Amazon link}
  • 1/4 cup of white wine - optional
  • 1/2 tsp rosemary {Amazon link}
  • 1.5 tsp basil {Amazon link}
  • 1 tsp oregano {Amazon link}
  • 1.5 tsp thyme {Amazon link}
  • 1 tsp parsley {Amazon link}
  • 1/8 tsp red pepper flakes {Amazon link}
  • Black pepper and salt to taste
  • 1 lb dry pasta - I used linguine

Instructions

Break the linguine noodles into thirds and set aside. Only use about 5/6 of the package for this recipe, since the full pack will be slightly too much.

Put 1-2 Tbsp oil into the Instant pot and hit the 'sauté' button. Once hot, add in the onions and garlic. Keep stirring frequently until the onions are browned. Turn the Instant Pot off.

Now you will add in all your ingredients in a layering type fashion. The goal is to get the noodles dispersed throughout the pot so they will not clump together while cooking. Put in a handful of noodles, then dump a can of tomatoes, some more noodles, some more liquid... you get the picture.

You need to make sure to add the 2 cups of chicken broth or water to this recipe. That is the liquid that will be absorbed by the noodles but will not make your sauce watery. I personally use my homemade chicken bone broth to get the extra nutrients from the homemade broth. Using chicken broth as opposed to water will intensify the flavor of the dish.

Stir all the ingredients well and make sure the noodles are not sticking up out of the liquid.

Put the lid on and make sure the valve is on sealing (not venting). Hit the 'manual' button and then make sure it is on high pressure, 7 minutes cook time.

When the 7 minutes of cook time is over, do a quick pressure release. Be careful of any splatter coming from the vent. I like to put a towel over the vent just in case that happens. I also use an oven mitt on my hand. Once the pressure has released, open the lid and stir. Let it stay on warming. I like to leave it sitting there, stirring occasionally, for about 8-10 minutes. It lets the flavors and liquids really intensify and the noodles to cook just a tad longer.

Ready to serve!

One Pot Pressure Cooker Spaghetti Sauce With Pasta and meatballs - Instant Pot

Some suggested accessories and ingredients for this recipe, see my full Instant Pot accessory list here:

Want to know how I organize and store all my recipes on my computer and share on all my devices? I use the Cookin' software! I can import recipes from the web, add my personal ones, add pictures, print pdfs, and then view them from my iPad, iPhone, etc!


Bridget Davet

Using the affiliate links in this blog to make purchases helps support my site. Thank you in advance!